Category: How To

How To’s

Lyn Bracey Camera Settings


Camera settings for Butterflies. ( Nikon )

(1) White balance – Auto.
(2) Iso – Auto – Set for Min. shutter speed 600 – Max Iso 3200
(3) Single point focus – Continuous servo mode – Back button focus. ( AF – ON ).
(4) Exposure – Spot metering. Aperature priority setting at f 11- Raw.
(5) Motor drive / Continuous release mode. – low speed.
(6) Exposure compensation – set to under expose by 1.7
(7) Lens Nikon 105mm macro – plus 2x convertor.

Updated: 19th January 2022 — 4:59 pm

Print mounting

Print mounting mb v1.3 23 Oct 2011

Make sure you read the above as this gives the EAF specification for print competitions which we adhere to.

There are lots of You Tube videos on how to do Mounting and Matting also.

A few examples here:

For those of you new to this. The Mount Board is the board the photo is mounted on. The Mat is the board with the window that sits on top of the photo.

Admin

Updated: 24th August 2016 — 5:07 pm

Setting up a Members Gallery.

Setting up a Members Gallery.

What do you need to do.

  1. First you need to have set up a Flickr account. If you have not done that and need some help there is a How To on the website.
  2. Once you have a Flickr account then you need to do a few things. First you need to find your User ID. There are a number of ways of doing this :

use this URL:

http://imapflickr.com/helpers/how-to.aspx?t=flickrUsername

another method:-


 ( Windows Only – there does not appear to be a Mac Version of this ) On you Flickr Home page you have a buddy Icon. This is located at the top right hand side of the screen and by default it is a camera. (You can change this in your settings) . Position your mouse pointer over the icon and Right click. A popup screen will appear with a lot of options.  Click the option View Image Info. it will look  similar to this :

This brings up another popup showing a lot of information regarding the Icon. E.g.

The line that is highlighted contains your User ID it is the Number sequence at the end after the #  i.e.  35417897@N02. If you right click on the highlighted line and then copy you can paste the line into another document for later reference.

OR

visit :

How do I find my Flickr ID?


OK that it for the User ID.

  1. You need to select the  photos  that you want to be in the Gallery and add a Tag to them. The easiest way to do this in Flickr is to go to your home page in Flickr.    Click on You at the top left hand side of your Flickr page and then click Organize.

This brings up a screen where you can organize the photos and edit some information. At the bottom of the screen there will be all the thumbnails of your photos. Drag the ones you want to be in the gallery onto the main screen. Then click Add Tags :

Another pop up appears

Type in the Tag you wish to be on all the photos in the Gallery.  A Tag is just a name.  Single words are best. If you want more than one word and the words have a space between them then you need to enclose them in Quote Marks e.g. “My photos” otherwise it appears as two separate tags.   Click the ADD TAGS button and that is it.

  1. You need to choose what type of gallery you prefer. Go here and make a choice from the four available Gallery types.

http://www.welwynphotoclub.org.uk/gallery-choices

Now you need to send us the following information.  Your User ID.  The Tag you have put on all your photos. The Gallery Choice you made (1, 2, 3 or 4) once you have made a choice it cannot be changed for a minimum of 3 months.

Go here to send the information:

http://www.welwynphotoclub.org.uk/member-gallery-request

Your Gallery will be verified and should be visible in about a week.

NOTES

You are limited to 20 photos in the Club Gallery. This is partly due to Flickr restrictions. However you can have as many photos as you like with your club website TAG. You can make changes to the tagged photos at any time so you are in complete control of which photos appear on the Club Gallery. If for example you have 20 photos tagged and you remove the tags from 5 photos and then add 5 other photos with the Club Gallery Tag the new photos will appear in your gallery.

Galleries 2, 3 and 4 are sorted by your Flickr photo description. This means you can give your photos a description in Flickr and they will appear in that order on the club website. e.g. You could use as the description 1 My photo , 2 My next photo etc. etc. The description does not appear on the club website but may on Flickr.

.

New photos  or any changes can take up to 12 hours to appear due to Flickr caching.

We reserve the right to remove Members Galleries.

Galleries from members who leave the club will be removed. ( with certain exceptions)

Updated: 18th September 2017 — 9:32 pm

Resizing Photo’s

The EAF have changed the size of images for submission to 1600 pixels wide by 1200 pixels tall. The club have adopted this size for all our digitally projected competitions.

Un-cropped landscape images are the easiest to resize using Photoshop’s Image Size command. Make sure that you switch on Constrain Proportions and Resample Image and then enter the new width of 1600 pixels and the height should change to a value less than 1200 pixels, this will depend on the aspect ratio of your camera’s sensor.

Portrait images are a little more complex, you still have to fit your image within the EAF size which means that the height of your image must not exceed 1200 pixels.

Using Photoshop’s Image Size command and making sure that you have Constrain Proportions and Resample Image turned on, enter the height of 1200 pixels and the width will adjust itself to a value less than 1600 pixels.

Other non-standard sizes are just as easy to deal with, they must still fit within the EAF size, the following is a panoramic image and as you can see it is wider than it is tall so all you need to do is resize it so that the width equals 1600 pixels and the height will adjust itself to a value less than 1200 pixels.

Square images should have their height adjusted so that they equal 1200 pixels, the width will adjust itself to a value less than 1600 pixels.

To sum up, regardless whether your image is landscape or portrait you need to make sure that the longest side does not exceed 1600 pixels if it is a landscape image or 1200 pixels if it is a portrait image.

Updated: 17th August 2018 — 5:34 pm

Setup A Flickr Account


To create a Flickr account and populate your gallery

This document is to help you with setting up a Flickr account with a view to using the account to show off your photos and  as a gallery on the club website

So First off I suggest creating some images for you to use once the account is setup. You can have up to 1000  images on the free  Flickr account (up to 1TB for Pro – but not worth the cost ) however the galleries on the club website generally support 20 images.

OK so you have now created a number of images that you wish to use ion your Flickr site or on your member’s gallery.

So now we want to get on to Flickr:

First we go to the Flickr web site, which is located here

www.flickr.com

What we want to do here is to select the Sign up option.

Now we need to start filling out the registration information. This should only take a few minutes.

You will need to enter in the following details:

Your first and last name

Email address  (this will be your login name).

Next enter your age; this is done, as some images are considered adult only.

Enter in a password (remember this).

Now click on the Sign up option


You will be sent an email to confirm that it is you – which you need to respond to to validate your account


you now have a Flickr account.


logon to flickr


If you need help on how to use flickr email admin@welwlyphotoclub.org.uk  and I will try and create a help file.

Updated: 3rd August 2019 — 12:10 pm

Fixing Converging Verticals

Converging Verticals

Load up Lightroom and select the image you wish to work on, I then usually copy this image as a virtual image on the MAC and  Ctrl’ on a Windows system.


Macintosh HD:Users:robpowell:Desktop:Screen Shot 2013-12-02 at 10.10.50.png

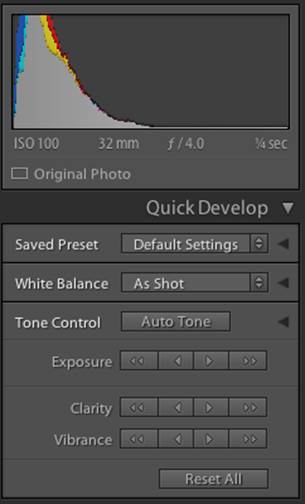
Adjust WB, Exposure or other pre-adjustment setting (save Sharpening for later)

For the purpose of this demonstration I am going to use the fast pre-set tools in Lightroom rather than the development module.

Macintosh HD:Users:robpowell:Desktop:Screen Shot 2013-12-02 at 09.12.48.png

Macintosh HD:Users:robpowell:Desktop:Screen Shot 2013-12-02 at 10.12.00.png

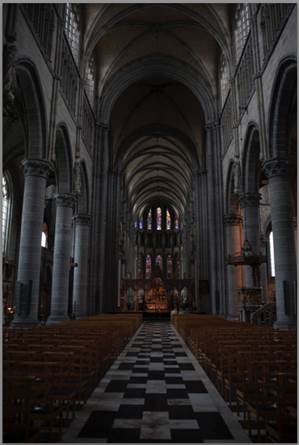
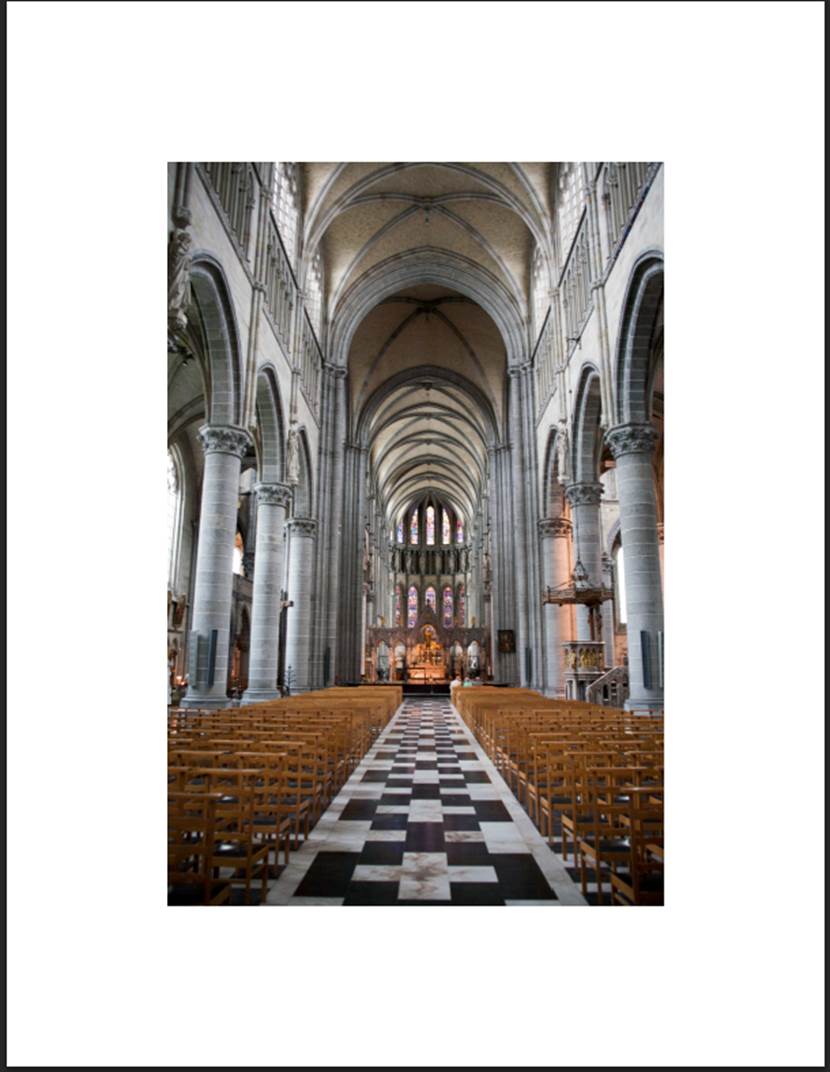
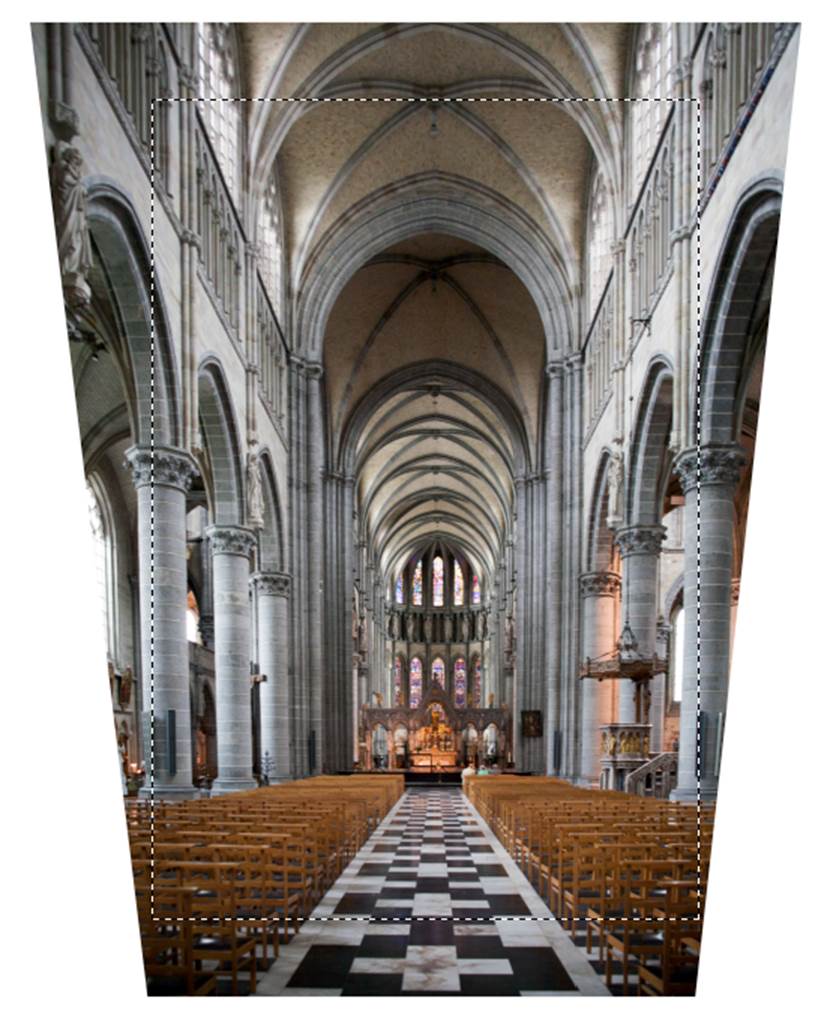
Now we have got our image where we have performed out first round of development, we need to work on the verticals, which in this image are leaning inwards and backwards.

Select to edit the image in Photoshop

Copy image to another layer cmd J on the MAC and Ctrl J on the PC

We will now start to work on the verticals

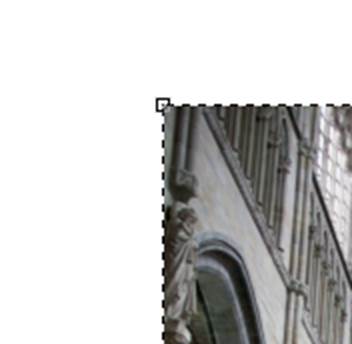
First select the whole image (either choose select and the all from the menu or cmd A on the Mac or Ctrl A on the PC)

Macintosh HD:Users:robpowell:Desktop:Screen Shot 2013-12-02 at 10.23.17.png

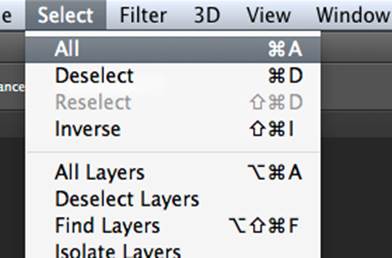
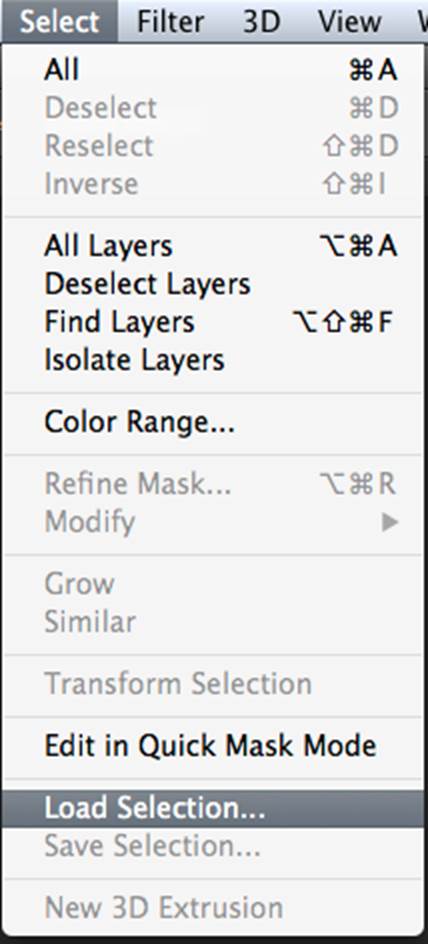
Now I then save this selection, choose select and the save selection.

Macintosh HD:Users:robpowell:Desktop:Screen Shot 2013-12-02 at 10.23.34.png

Why we do this will become apparent latter.

Now we need to give ourselves some room to extend the image in to. So we are going to expand the canvas we are working on. This is very simple to do

Choose image from the menu and select canvas size

Macintosh HD:Users:robpowell:Desktop:Screen Shot 2013-12-02 at 10.27.41.png

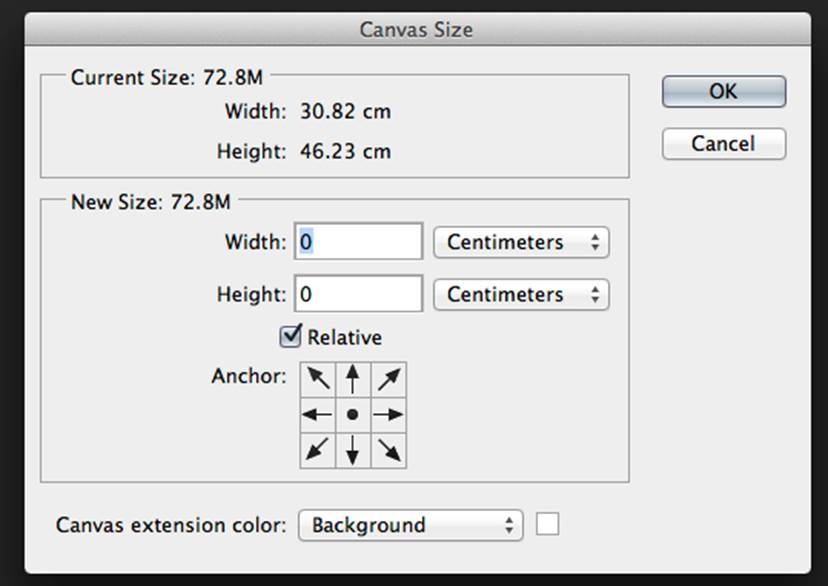
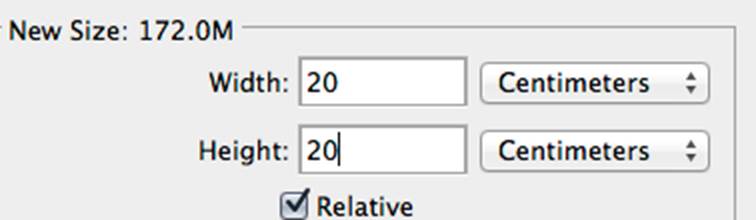
I leave the anchor points in their default settings. I then increase the width and height by around 20cm. Notice the file size increase as you modify the canvas size

Macintosh HD:Users:robpowell:Desktop:Screen Shot 2013-12-02 at 10.28.09.png

Once you click OK you will see a large white border appear around the image

Macintosh HD:Users:robpowell:Desktop:Screen Shot 2013-12-02 at 10.28.19.png

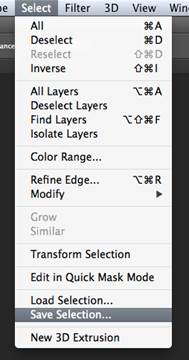
Now we are going to reload our selection. Choose select and then load selection and choose the selection you saved earlier.

Macintosh HD:Users:robpowell:Desktop:Screen Shot 2013-12-02 at 10.38.02.png

Macintosh HD:Users:robpowell:Desktop:Screen Shot 2013-12-02 at 10.38.15.png

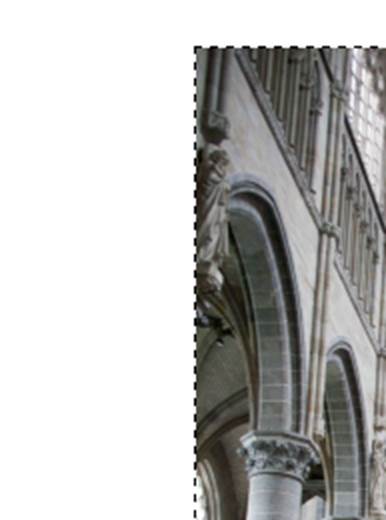
You should now see what is known as the marching ants appear around your image

Macintosh HD:Users:robpowell:Desktop:Screen Shot 2013-12-02 at 10.38.28.png

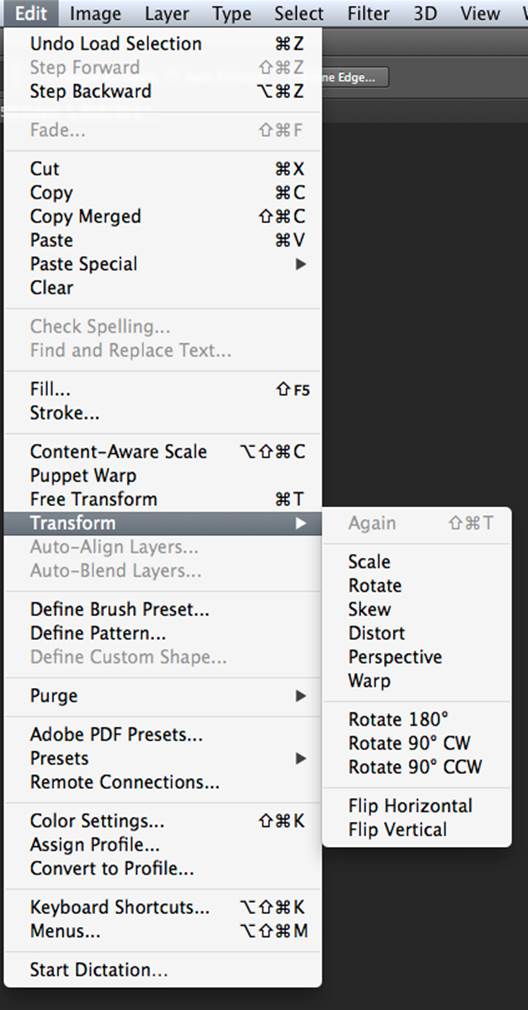
Now we can start to work on those columns. What we need to do is use either the distort or freeform transform tool.

I’m going to use the distort tool.

From the edit menu select the Transform option and from the drop-down select Distort.

Macintosh HD:Users:robpowell:Desktop:Screen Shot 2013-12-02 at 10.42.27.png

You’ll notice that the “marching ants” now have control node at the corners

Macintosh HD:Users:robpowell:Desktop:Screen Shot 2013-12-02 at 10.42.48.png

If you click on one of these control nodes and move it outwards you will see the image will expand. It may not only go left/right it may go up as well. If you don’t want this to happen then hold the shift key whilst moving. The movement will be locked to left/right only. If you make a mistake then cmd z or Ctrl z will take you back one step.

Macintosh HD:Users:robpowell:Desktop:Screen Shot 2013-12-02 at 11.07.07.png

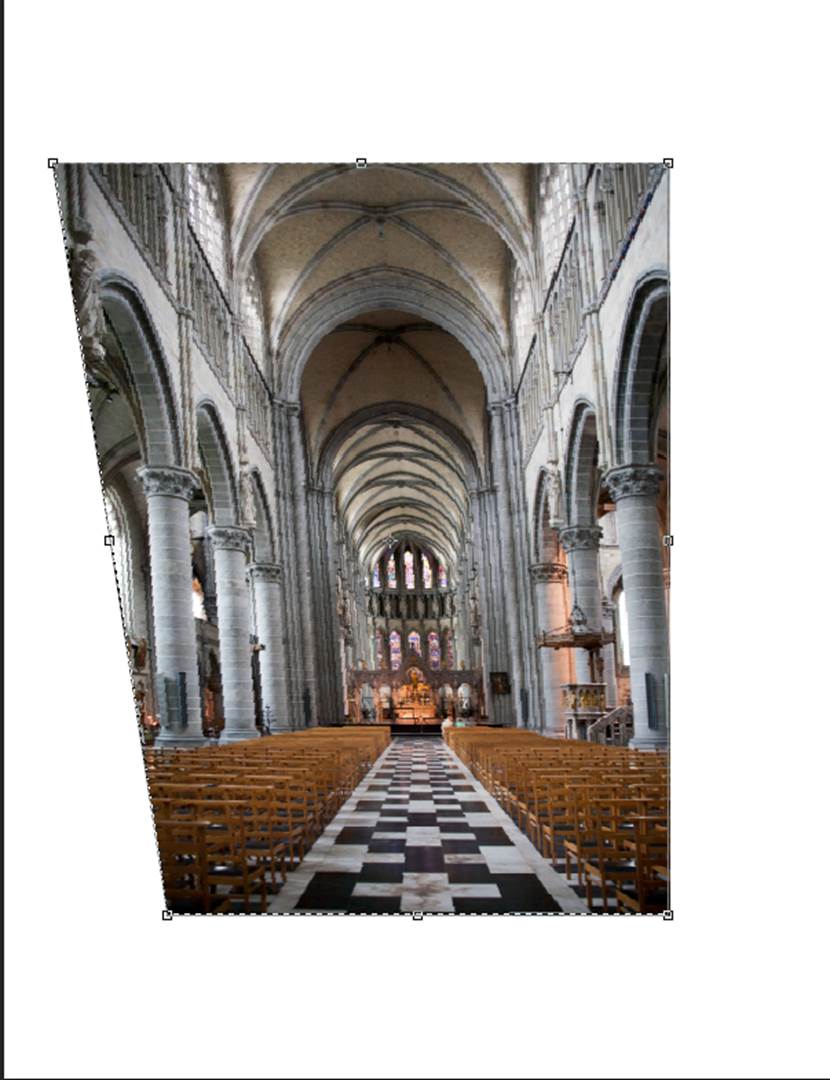
Now pull out the top edges until the vertical are straight. Bear in mind that when you pull out the second corner it may pull back the first corner a little.

Macintosh HD:Users:robpowell:Desktop:Screen Shot 2013-12-02 at 11.07.31.png

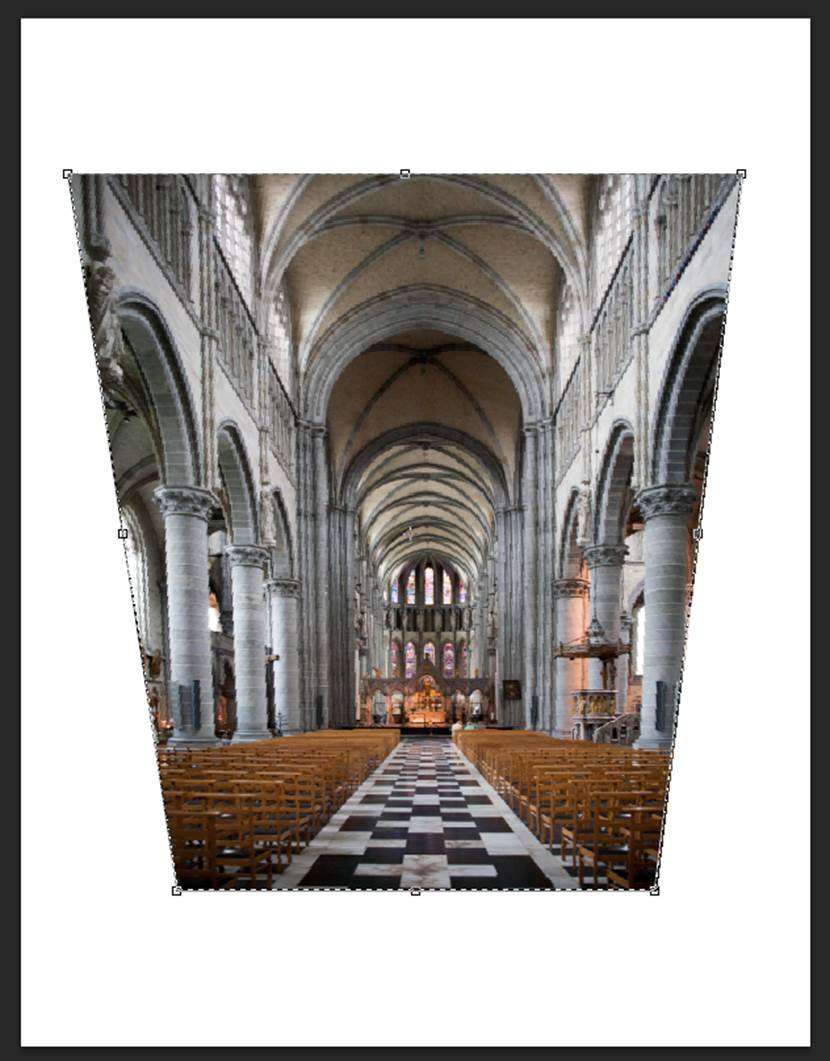
Now one of the downside with this process is that the image may now appear squashed. So you may need to stretch up the image. To do this, select the control node at the top middle, hold the alt key and move upwards.

Macintosh HD:Users:robpowell:Desktop:Screen Shot 2013-12-02 at 11.09.03.png

The image will not only expand upwards but down wards as well.

Macintosh HD:Users:robpowell:Desktop:Screen Shot 2013-12-02 at 11.13.58.png

Now once you have straighten out the verticals and you are happy with the image, just hit enter and the transform with be applied.

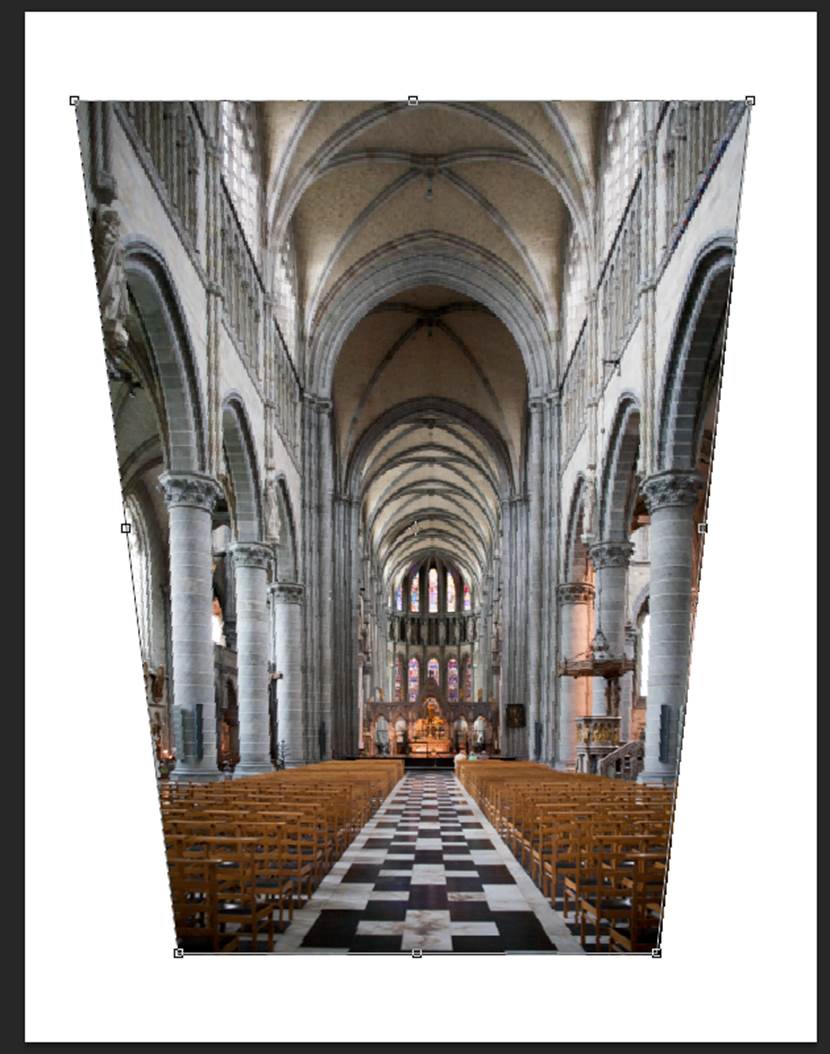
Now we need to reload the selection we saved earlier

Screen Shot 2013-12-02 at 11

Now it’s possible that the earlier selection no longer suites the image you wish to create. You can change the select by selecting the select menu option and then transform selection. You can then resize the selection window by using the control nodes as you did before. When your happy with your proposed selection hit the enter new.

When you are happy with your selection, select image and crop

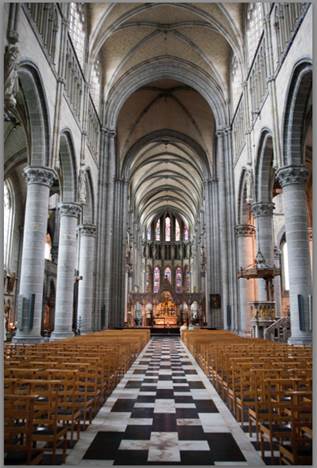
We now have an image where the verticals are straight and we can continue with our dark room workflow.

To get back to Lightroom, select to quit Photoshop, the software will prompt you to save your image, do so and it will be imported back into Lightroom.

You can now continue to work on the image.

Updated: 24th August 2016 — 2:56 pm